Identifying A Fiberglass Roof
Most modern RVs do not have fiberglass. The reason being the fiberglass RV roofing is becoming rare. Fiberglass roof display below characteristics.
- This type of roof will be hard. Fiber roofs are known to be the hardest and none flexible.
- The fiberglass is smooth and slippery when wet.
- It can be dangerously sleek when it is wet. Thus, one needs to be cautious when cleaning it.
Different Types Of Rubber Roofs
There are two different types of rubber roofs: EPDM and TPO. EPDM is short for Ethylene Propylene Diene Monomer. TPO stands for thermoplastic polyolefin, a synthetic rubber used on RV roofs. The trick is to find out what type of rubber roof you have, so you can maintain your rubber roof the right way. Campers should refer to the owners manual of their RV or camper to see which type of rubber roof they have. If you have no owners manual or it doesnt specify, here are some ways to tell if your roof is EPDM or TPO.
- If you notice white or gray streaks down the sides of your RV or camper, you likely have an EPDM roof as they are supposed to shed slightly as a protection against UV rays. This shedding is less than 10% over a decade of time and shouldnt affect the life of your rubber roof, although it will still need regular maintenance the same as any roof.
- A second way to determine which type of rubber roof you have requires some caution. An EDPM rubber roof will be very slippery when wet, while a TPO roof is not.
- TPO is also very glossy while EPDM is not.
- The texture may also give some clues as to what type of roof is on your RV or camper. EPDM is very smooth, while TPO may be slightly bumpy, similar to an orange peel.
- An EPDM rubber roof will also take on a chalky look.
Finish Up The Rv Rubber Roof Replacement
With the new roofing material installed, youre almost ready to get back on the road. Cut out the holes for your rooftop equipment.
Secure the edges using wood-to-metal screws or staples. Then, cut off the excess material.
Pro tip: Drill a hole or use a hole punch to mark the corners of the required holes. This keeps the material from ripping when you cut it.
Reinstall your termination bars along the sides, rear, and front of your RV. To keep everything nice and dry, you could use some butyl tape behind the termination bars. Then cut off the excess right underneath the bar.
Finally, reinstall all your RV rooftop equipment and seal everything with your favorite RV sealant. We recommend the Dicor EPDM Self Leveling Sealant if its a rubber roof.
You May Like: How To Install Solar Panels On Corrugated Metal Roofing
How Much Does Replacing An Rv Roof Cost
- Post last modified:August 20, 2020
We may get commissions for purchases made through links in this post.
Do you want to know how much it costs to replace a roof on an RV? Doing research ahead of time will help you prepare. Luckily for you, we have already done the research. Below we listed what we found about the cost of replacing an RV roof.
The cost of replacing an RV roof will be around $300-$325 per linear foot. If your RV is 36 feet long, it would cost between $7,000 and $12,000 to replace the roof of your RV.
As we told you in our article on RV roofing types, there are several types of RV roofing materials. Click here to read the article. Because of those differences, your price estimate will vary depending on the type of roof you choose to replace the old roof.
Still not convinced? Let us explain further.
Remove All Vents Hoods & Housings

The first thing we need to do is remove any vents, vent hoods, and housings that are on the roof of your vehicle.
Vents and housings are fairly straight forward to remove. Simply unscrew them with a Phillips or a 1/4 head screwdriver and use a putty knife to scrape off the old lap sealant and pry the vent or housing off the roof.
*Tip: If youre reusing the vents or housings, be sure to carefully remove them as to not crack or damage the base. And completely remove any old sealant from the unit.
Read Also: How To Install Zinc Roof Strips Without Nails
How To Know What Type Of Roof My Rv Has
Taking care of your camper is essential if you want to have it serving you for a long time. Neglecting it will lead to wear and tear. However, if you do not know the type of roof you have, it will be a challenge for you to give it the best care.
So, how do you identify the type of roof your RV camper has? Lets find out.
Repairing Or Replacing Your Rvs Roof
Lets face it, when owning an RV, theres a good chance that at some point youll need to repair your roof, especially if you own it for several years, use it often or your RV is exposed to varied natural elements. Another thing to keep in mind when using your RV, is that when you are in motion, youre exposing your roof to constant wind. More so than traditional homes or businesses, so this causes additional stress to your RVs roof as well as other components that may be attached to your roof such as vent covers, air conditioning units or solar panels for those that enjoy boondocking.
In this article, well examine what types of roofs are used for RVs and how to identify those roofs. Ill also explain the differences in rubber roofing and what may work best for you when replacing this type of roofing. Additionally, Ill touch upon the importance of proper roof maintenance, how often you should inspect your roof, and what course of action you should take when your RVs roof needs replaced or repaired.
You May Like: How Do I Know If My Roof Is Leaking
How To Coat A Rubber Rv Roof
If your RVs roof is made of EPDM or TPO, you will need to re-coat it every year or so to maintain it properly and maximize its lifespan. Here are the steps for Applying Rubber Roof Coating To Your Camper:
Check the roof for any leaks, and repair them before coating your camper foof.
Deep-clean the entire roof power-wash, then scrub stained or dirty areas with a 1:3 bleach/water mixture and a thick bristled street broom or scrubber. If the bleach doesnt get the stains out, try TSP and water. Power wash the roof again after cleaning to rinse it.
Remove old RV roof coatings and all silicone excess around the roof vents, air conditioning unit, and other systems.
Glue down any raised areas around the roof with M-1 sealant or EternaBond DoubleStick.
For EPDM roofs, you should apply a thin layer of EPDM primer before applying the roof coating.
Open the coating can and remove any skin on the surface. Stir the coating for four to five minutes, until it is fully combined.
Apply the roof coating . Let it cure for one to three days, depending on the temperature in your area. Then, apply a second coat in the opposite direction.
The Ultimate Diy Rv Rubber Roof Replacement Guide
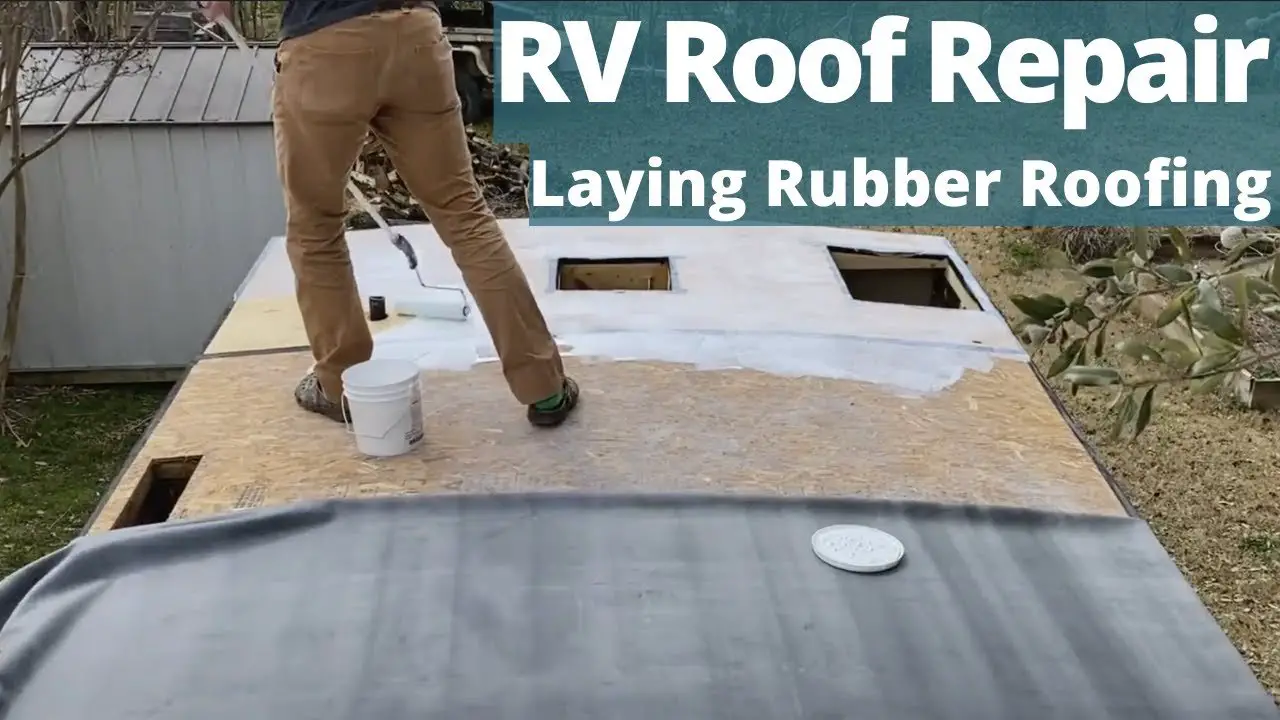
If you already own or recently acquired an older RV, there may come a time when no amount of resealing or recoating is going to solve your leaky roof. There comes a time when you need to perform an entire RV rubber roof replacement.
But how? Taking off the roof of your RV and completely replacing it seems like an impossible job.
Until now. Here is everything you need to know in order to do your own DIY RV rubber roof replacement.
Don’t Miss: Will A New Roof Lower My Home Insurance
Identifying A Rubber Rv Roof
Most people will be able to know a rubber roof by just looking at it, however, if you are not sure, look at these characteristics.
- You will know that it is a rubber by its softness.
- Most of the rubber roofs are soft and white in color.
- If they are a bit old, they will look off white.
- They are also chalky.
- With time rubber roofs become chalky if they are made of rubber.
How To Repair A Punctured Rv Roof
Although you might pay a professional to do a full roof replacement for your RV, there are many roof repair jobs that are easy and far cheaper if you do them yourself.
One of these is repairing a punctured or torn RV roof. To fix this kind of damage, all you really need to do is install a patch:
Thoroughly clean the area around the repair.
Remove any excess silicone.
Apply sealant or caulking to any recesses, and let dry.
Glue down any loose roof membrane, and add fasteners if needed.
Let it cure 24 hours.
Apply the patch so that theres at least two inches of overlap on all sides of the repair area, and cover any reinforcement fasteners.
Seal the patch and edges around it with RV roof coating.
RV roof tape or RV roof patches are easy to apply, with adhesive on one side that sticks to your RV roof and seals up the torn or punctured area.
These patches are very durable, and provide a permanent solution to a tear or small hole.
Its a good idea to keep some in your RVs emergency tool kit just in case something happens while youre out on a trip. You dont want a punctured roof causing leaks and creating water damage!
Recommended Reading: How Does Insurance Cover Roof Replacement
Different Types Of Rv Roofs
There are four types of materials used in RV roofs. The materials used are:
- Ethylene Propylene Diene Monomer Rubber
- Thermal Poly Olefin Rubber
- Fiberglass
- Aluminum.
Most people assume that any roof on the RV will do as long as it is well installed. However, when getting a roof on the RV, it is best to understand that various types offer different experiences. Each have their own pros and cons.
Understanding the pros and cons of each RV roof material will enable you to make an informative decision.
Choosing a wrong roof option will end up frustrating you in the long run.
Before seeing the advantages and disadvantages each of these roof materials have, lets address the other main question .
What type of Roof My RV has?
How Much Does It Cost To Coating/ Reseal An Rv Roof

The cost of repairing and sealing the RV roof will depend on the materials used and the area to be covered. When planning to improve or use a sealant on your RV, it is advisable to carry out some research before making your decision.
Ensure you get the price of the different products that you need from the dealers. We already saw of the products above.
On an average the cost of coating the RV roof comes to around 20 cents to 40 cents per square foot depending on the type of roof.
Remember there will be other costs involved as well like cleaning, taking professional help and so on.
Read Also: What Is A Roofing Contractor
Do I Need Additional Protection For My Rv Roof
After you reroof your RV, you want to apply additional protection against the elements to help extend the durability and appearance of your roof. Here are some options you can use:
- Rubber roof coating if your RV has a rubber roof, adding a layer of rubber roof coating helps preserve the flexibility and structural integrity of your roof. It also helps waterproof your roof.
- RV Liquid Roof RV liquid roof is a compound made from EPDM rubber in liquid form. As with rubber roof coating, it helps add a layer of protection on your RV roof.
- Roof covers roof covers are a cheap and easy way to add protection to your RV roof. Look for waterproof and UV-resistant models to help protect your RV roof against sun and rain damage, especially if you store your RV outdoors.
Track Your Rv Maintenance And Repairs
Make sure you keep track of all your RV maintenance and repairs with an online tool such as Maintain My RV. Not only can you keep all of your documents in one place, but youll also receive timely reminders when maintenance is due to help you avoid costly repairs and potentially serious accidents.
Related articles:
You May Like: A Citizen Roofing Evansville In
What Tools And Supplies Do You Need
Outside of the components of the kit, there are going to be a few tools and supplies that will make this job much easier. Instead of explaining each one and what they do, Im just going to provide a bulleted list of what I used and as we go through the process you will see how they apply.
- A-frame ladder
Recoat The Roof Surface
At some point during your RVs life, you will probably need to recoat the roof. This is a protective layer that covers the roofing material almost like paint.
Over time, the coating becomes chalky and may wear off. Although this is normal, its a clear sign that its time to recoat the roof.
The coating is important because it helps to increase the waterproof and weatherproof capability of the whole roof.
Be sure to keep in mind that you might need a specific type of coating depending on the type of roof material you have.
One method of recoating is an RV liquid roof, which is an EPDM coating that you paint onto the roof of your camper.
The liquid roof costs almost $90 per gallon, which covers about 42 square feet. For our 30-foot by 8 ½ foot camper example, wed need about six gallons to cover the roof.
You can save if you buy the material in larger quantities, such as four or five-gallon pails.
Once dry, the liquid roof barrier protects it from UV rays from the sun and also adds weatherproofing to block moisture and slow wear-and-tear from the elements.
Read Also: How To Repair A Rubber Roof
Prevention The Best Protection
The best weapon against having to replace your RV roof is prevention.
RV Roof Covers
Ideally, the storage of your RV should include a roof over your RV. This will go a long way in keeping the RV roof from being damaged. However, since that isnt always an option. RV covers are an excellent way to prevent the elements from working their magic. A cover will protect your RV from moisture, wind, dirt, and ultraviolet light.
No matter what type of roof you have on the RV, you should check it routinely to prevent missing a leak, and getting left with significant water damage. Even a pinhole leak left unchecked can cause mildew, mold, and water damage.
Here is a list of the best sealants to use for your RV roof.
- Dicor 501LSW-1
- Proguard F99911-4
Prepare Your Rv Roof For Repair Or Replacement
The first step to any RV roof job is to clean the existing roof or repair area well. In order for the adhesive or catalyst material to bond with the roof material, all traces of oil, grease, grime, oxidation and silicone sealants must be removed.
If its just a small repair, feel free to use a rag and a solvent to scrub the area clean.
For larger repairs and full roof resealing jobs or replacements, it might be more effective to first power-wash, then scrub where necessary until the roof is completely clean.
With EPDM roofing, you will need to cut away any residual silicone caulking and remove any surface wax with a removing agent designed for this purpose.
Once the roof is dry after cleaning, you will likely need to apply an EPDM primer.
Even if you did a fantastic job cleaning the roof, its likely to still be dirty or stained in some areas, so using a EPDM primer will prepare the surface for a better bond between the roof and the tape.
Don’t Miss: Do It Yourself Metal Roofing Kits
Does Rv Insurance Cover Roof Leaks
Replacing a rubber roof can be expensive, but not as much as replacing the whole RV. In most cases, an insurance policy will cover your new roof for any damage done by weather or fire. As long as you have collision coverage on your RV and comprehensive coverage on your auto, its likely that if something happens to the vehicle while in transit from one place to another , then this part of personal property is covered under what are called comprehensive policies. If there is no exception noted for specific types of vehicles such as RVs or motor homes in their automobile policy declarations page, it should be included unless otherwise agreed upon with their insurer beforehand.
If you need additional information or clarification, then its best to reach out to your insurance provider.
Cut Holes For Your Installed Items

Next, use a utility knife to cut out the holes for your vents, skylights, and air conditioners on the camper roof
Cut the holes in an X shape, so you can fold each flap down into the hold, allowing you to screw the flaps down for a tighter fit. This may not be possible if the interior parts of these items need the full width of the opening. In this case, you will have to cut the membrane along the edge of the opening.
Recommended Reading: How To Generate Roofing Leads
